

 login
Оставьте свои данные
и мы вам перезвоним:


How to Register for AmirNet: Step-by-Step Guide with Screenshots
You register for AmirNet yourself, on the website of NITE (the National Institute for Testing and Evaluation). The registration form is in Hebrew only, so we went through it step by step, translated every field and marked it on screenshots.

In short
- – Where: on the NITE website, via the link on the AmirNet page.
- – Fee: 315 ₪, paid by Visa, Mastercard, Isracard or American Express.
- – Deadline: at least two business days before the test, if seats are still available.
- – The test time is assigned by the system. You can’t choose it.
- – You must wait at least 35 days between two AmirNet tests.
What you need
- – Your Israeli ID (teudat zehut). If you don’t have one, an Israeli passport will do. Without any Israeli document, you register with a foreign passport.
- – A mobile phone number and an email address you actually use: the registration confirmation is sent by email.
- – A credit card for payment.
If you are already a student and your university gives AmirNet on campus, you register through the university, not through this form. Check with your institution.
Step 1. Open the registration form
Go to the AmirNet page on the NITE website. In the grey box that says “To register for the test on the NITE website, click here”, click “here”.
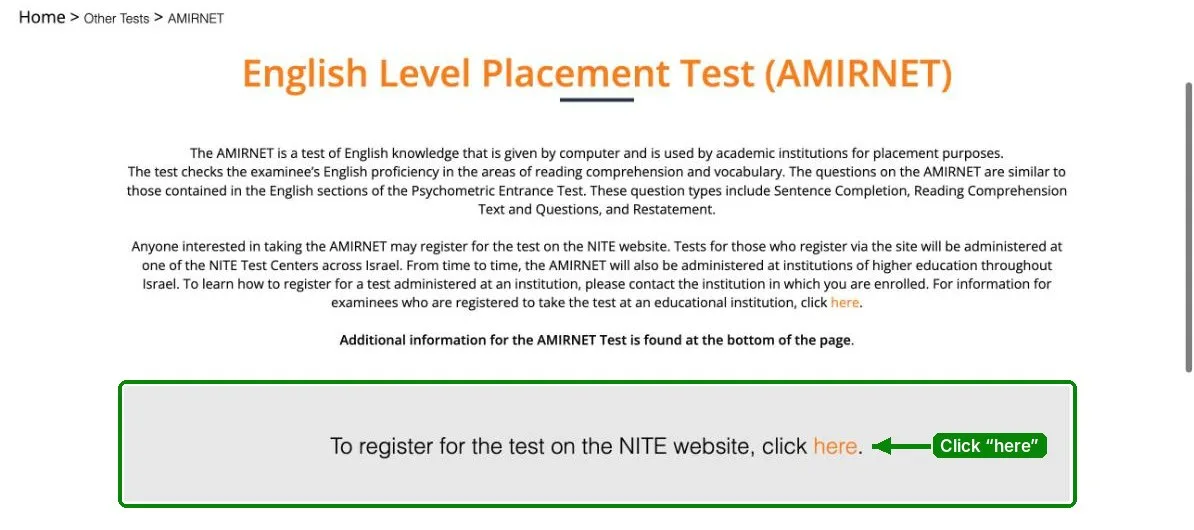
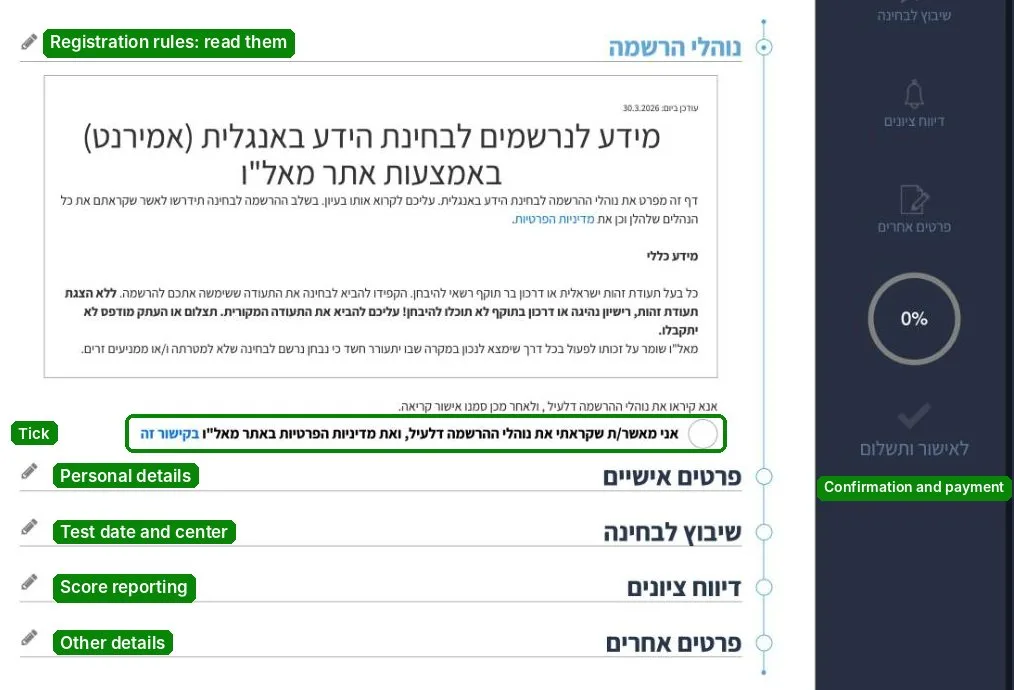
The form “הרשמה לבחינת אמירנט - אנגלית” opens. It has six sections, listed in the menu on the right. You can move between them in any order.
Step 2. Registration rules (נוהלי הרשמה)
Read the rules and tick the circle below the text. This confirms that you have read the rules and the NITE privacy policy. Without this tick the system won’t let you pay.
Step 3. Personal details (פרטים אישיים)
Fields marked with an asterisk are required. Gender, street, ZIP code and the landline number are optional.
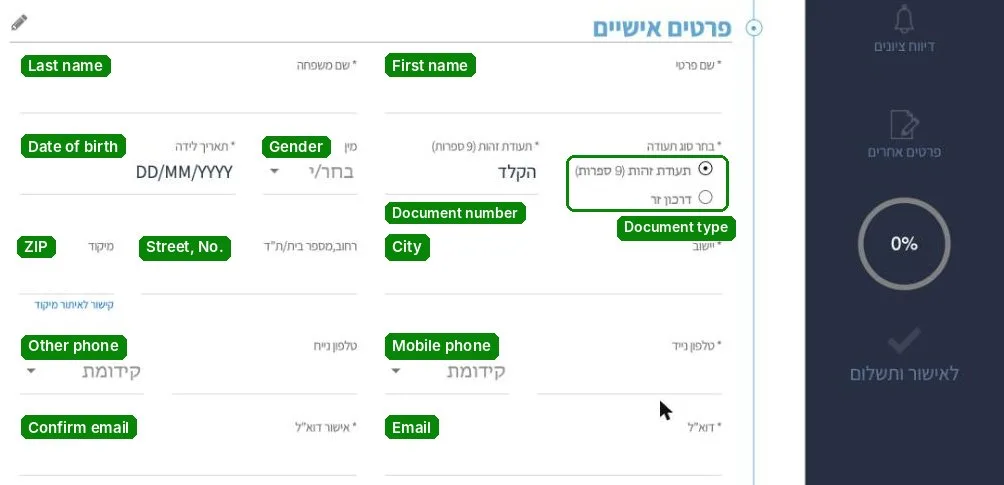
- – Document type: “תעודת זהות” (Israeli ID, 9 digits) or “דרכון זר” (foreign passport).
- – With a foreign passport, enter the last 8 digits of the number. If it is shorter, add zeros on the left.
- – When you apply to a university or college, use the same document number you registered for the test with.
- – For phone numbers, first choose the prefix (“קידומת”), then type the number.
- – Enter your email twice and check it carefully: the registration confirmation will be sent there.
Step 4. Test date and center (שיבוץ לבחינה)
First choose a test center:
- – “באר שבע והדרום”: Beer Sheva and the South;
- – “חיפה והצפון”: Haifa and the North;
- – “ירושלים והסביבה”: Jerusalem area;
- – “תל אביב והמרכז (זמני) - מכון מופ”ת”: Tel Aviv, temporary center at the Mofet Institute;
- – “תל אביב והמרכז (זמני) - רמת גן”: Ramat Gan, temporary center at the Academic Center for Law and Business.
In the calendar, days with available seats are green. Once you pick a date, the center, date, time and fee appear below.
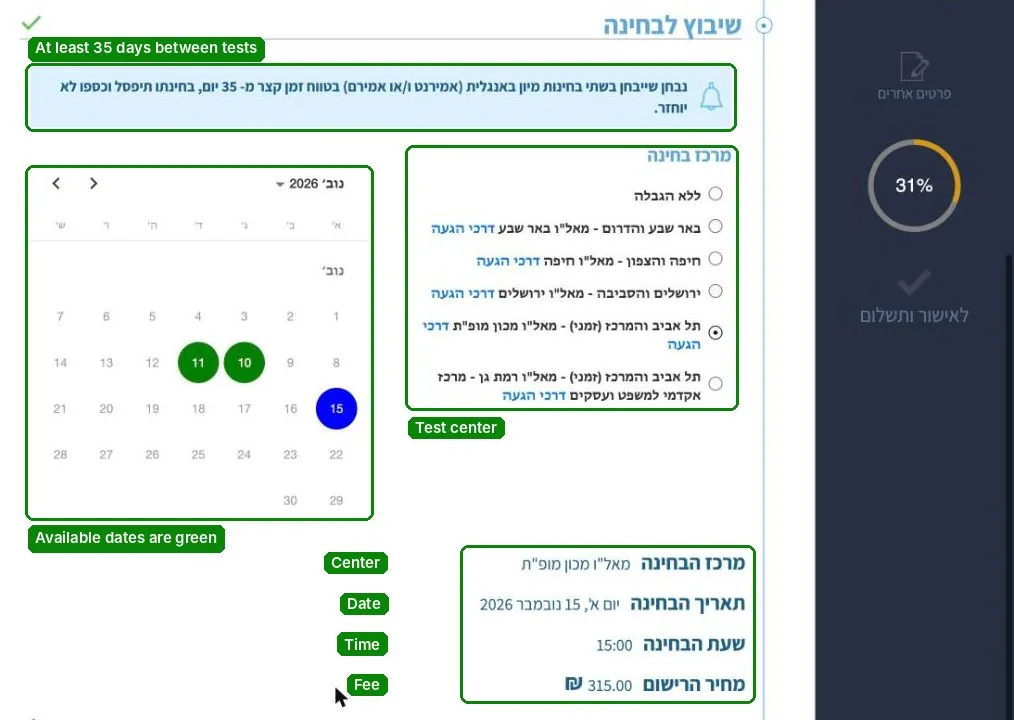
Note the blue box above the calendar. If you register for two English placement tests less than 35 days apart, the second test will be cancelled and the fee will not be refunded.
Step 5. Score reporting (דיווח ציונים)
Here you choose which institutions will receive your score. You don’t have to change anything here. Eight universities are already selected: Ben-Gurion, Bar-Ilan, Haifa, the Technion, the Hebrew University, Tel Aviv, Ariel and the Open University.
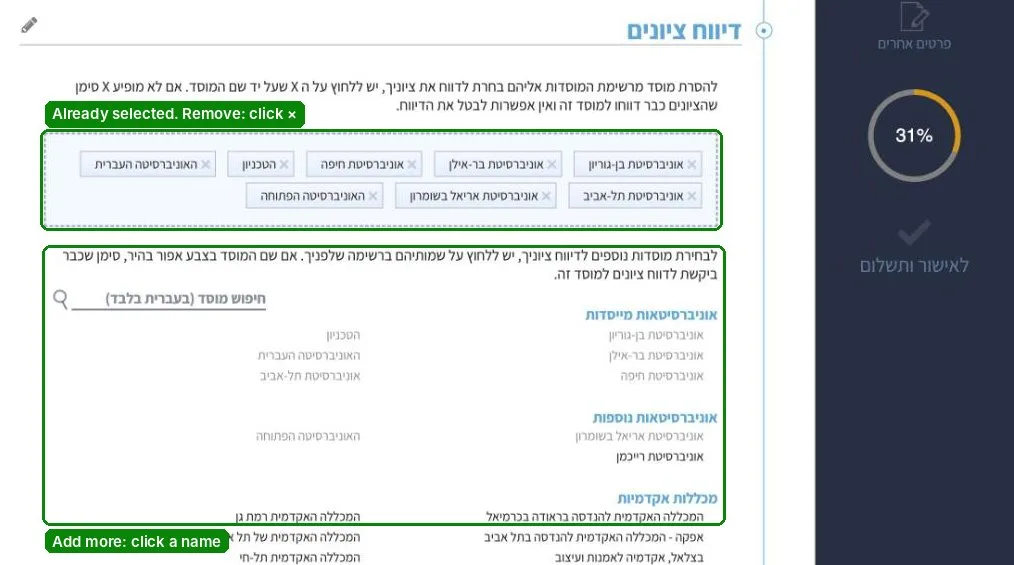
- – To remove an institution, click the × next to its name.
- – To add one, for example Reichman University or a college, click its name in the list below. The search box works in Hebrew only.
- – If there is no × next to a name, your score has already been sent there and this can’t be undone.
We recommend checking that every institution you plan to apply to is on the list, especially if it is a college.
Step 6. Other details (פרטים אחרים)
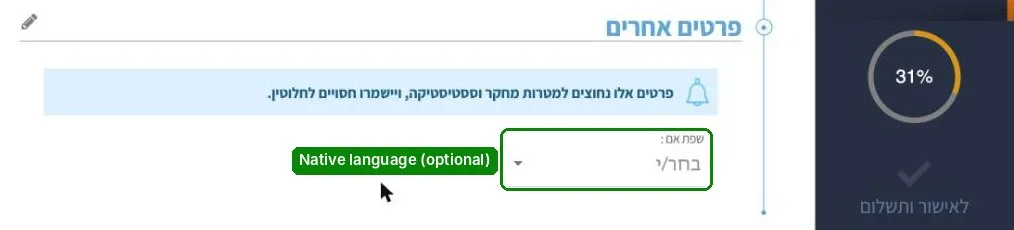
This section is optional and can be skipped. It has one question, your native language (“שפת אם”), which NITE collects for statistics.
Step 7. Confirmation and payment (לאישור ותשלום)
Click “לאישור ותשלום” at the bottom of the menu on the right. If a required section is incomplete, a red “!” appears next to it. Go back and fill in what is missing.
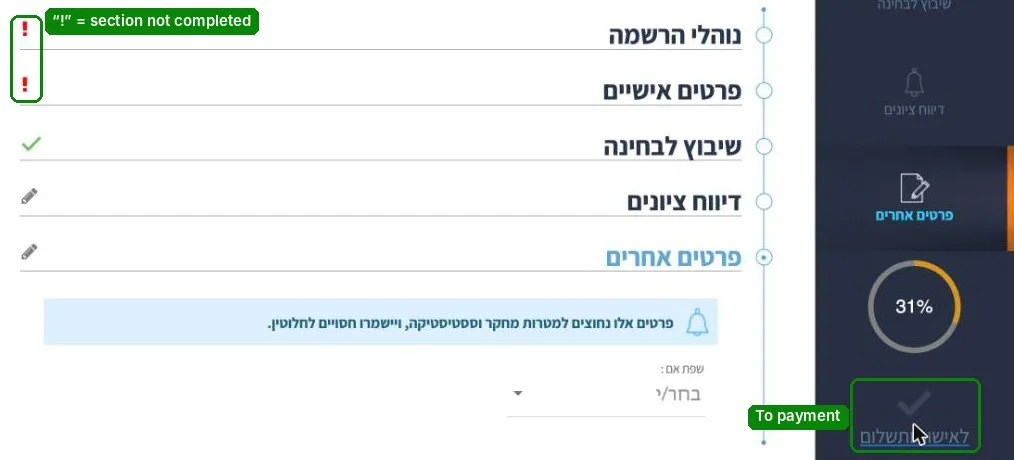
Then check the summary and pay the fee of 315 ₪. Your registration is valid only once the system records it and shows a confirmation.
After you register
- – You will receive a registration confirmation by email. Check your name, document number, date and place right away: if anything is wrong, correct it in your personal area.
- – You can change the test date or center free of charge in your personal area up to two business days before the test. After the test day, a change costs about 45% of the test fee.
- – Your score appears in your personal area on the NITE website within 10 business days of the test. It is not sent by email.
What to bring to the test
The original document you registered with. Without an Israeli ID card, driver’s license or valid passport you will not be allowed to take the test. Photos and copies are not accepted.
The rules are taken from the NITE page on AmirNet registration. Fees and rules change from time to time, so check the amount in the system before you pay.
Want to prepare for AmirNet? Join us at OK! (The page is in Hebrew.)